◯やりたいこと
(3)、(4)で製作したボードとケースを組立て、以下の仕様でスケッチを作成し電流計を完成させます。
○仕様
・供給電圧 3.3V(max 800mA)
・電流測定範囲 (トグルSW切替)
High:1024mA〜10mA
Low:256mA〜1mA
・電流ロギング機能 (WiFi転送)
10sec〜6min (プッシュSW切替/長押しスタート)
・単3電池 3本
電流の測定範囲はシャント抵抗の影響もあり現実的には最大値の 1/10程度です。あくまでも「測定可能範囲」です。
◯やったこと
・組立て
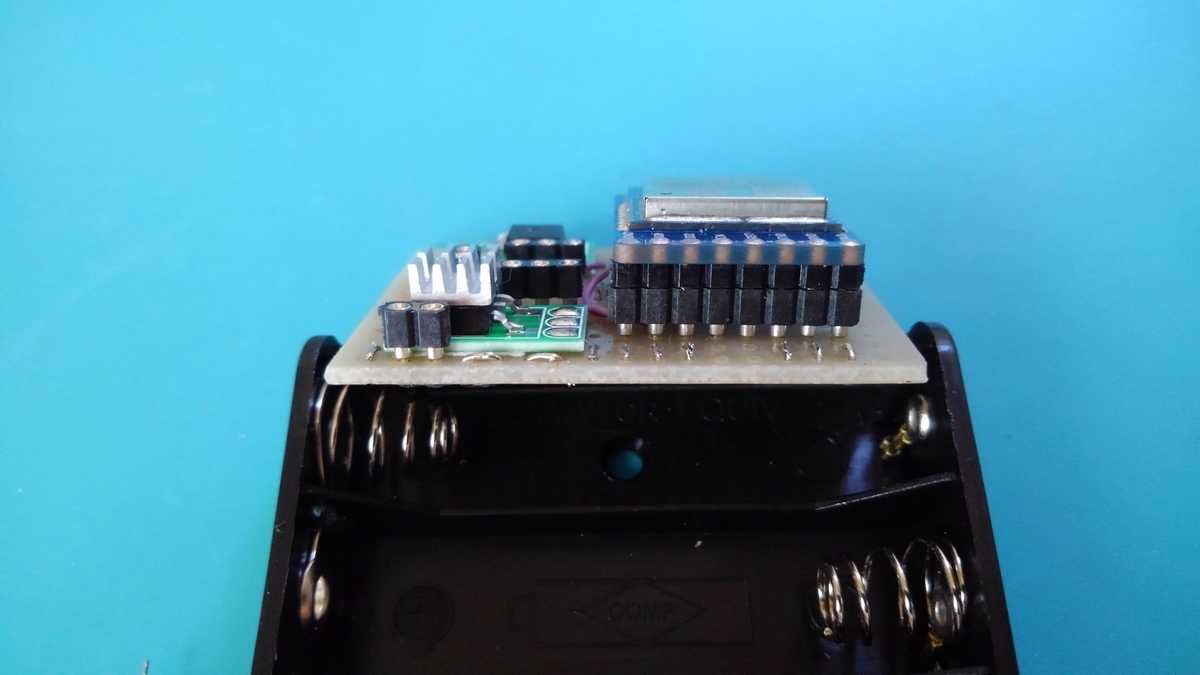
(3)で作成したメインボードと(4)で作成したケースを合体させます。

組み立てる前にまずWROOM-02のピンヘッダ加工をしておきます。ピンヘッダは丸ピンソケットに対し足が長いためそのままだとムダにボードの高さが高くなるためです。
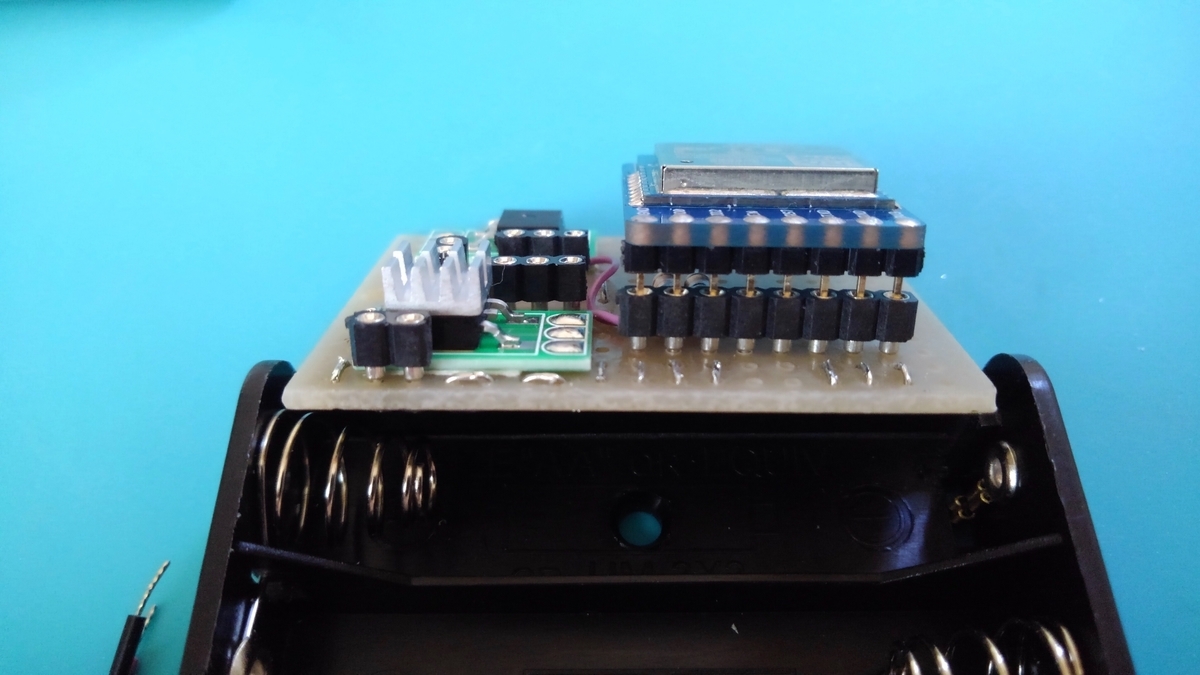
1.5mmのボード2枚を使って足の長さを確保しフラットカットニッパでバチバチ切断。
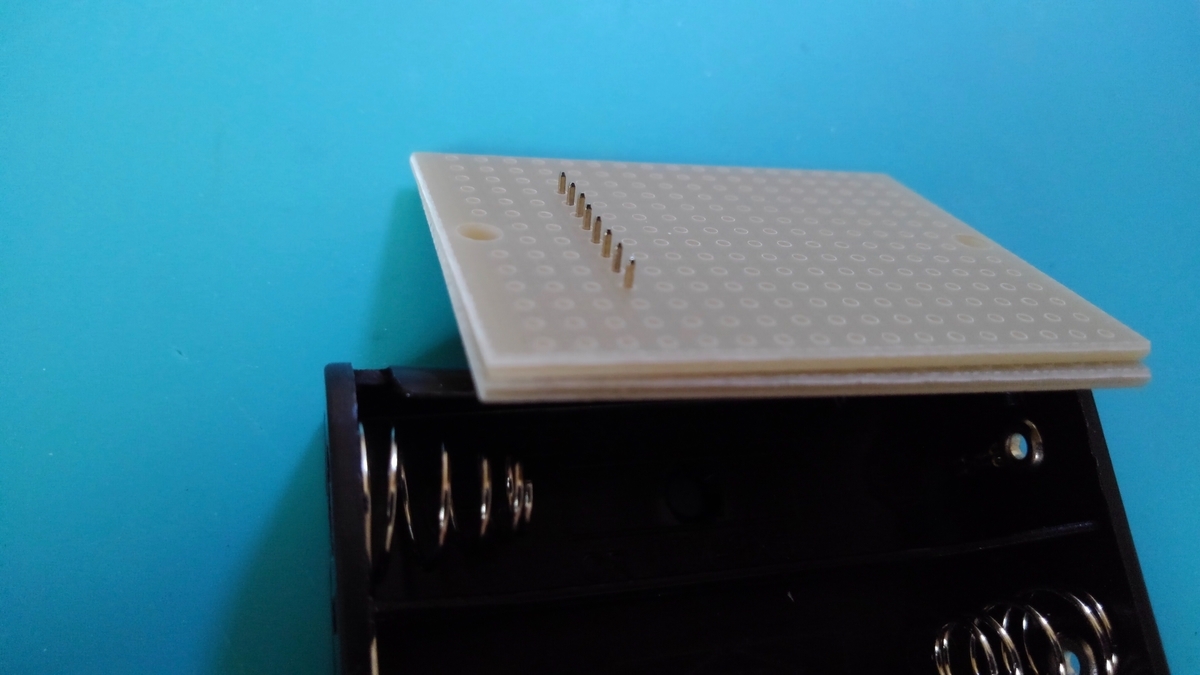
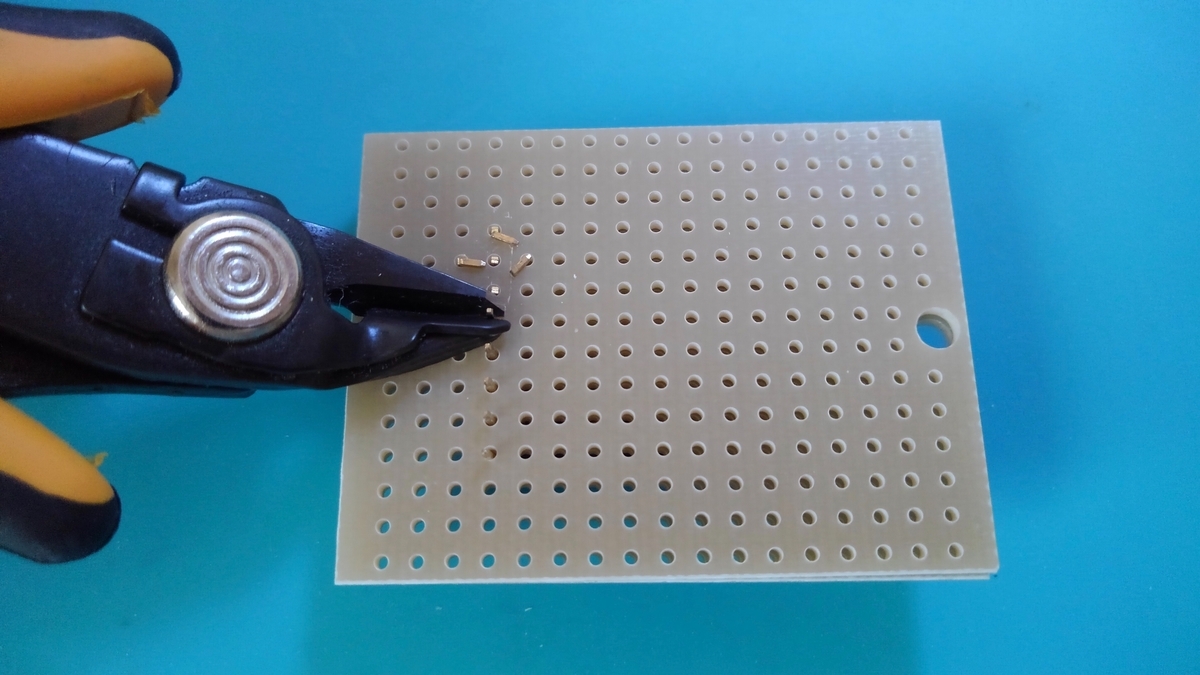
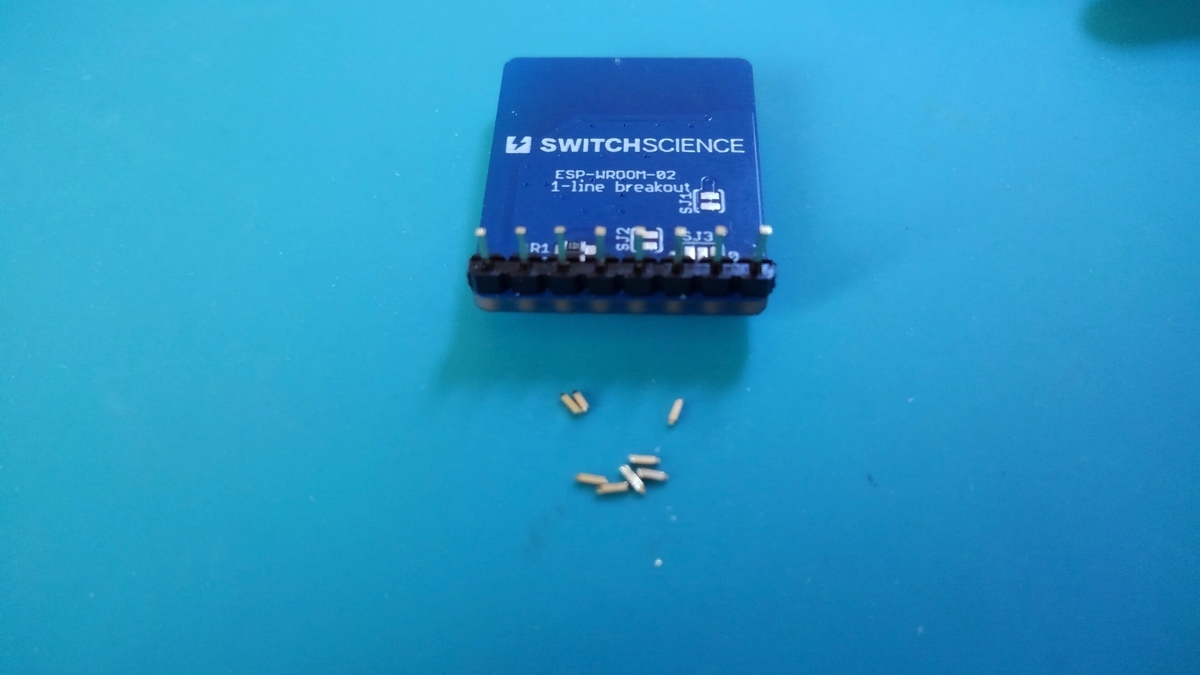
これで1.5mm程高さを低くすることができます。
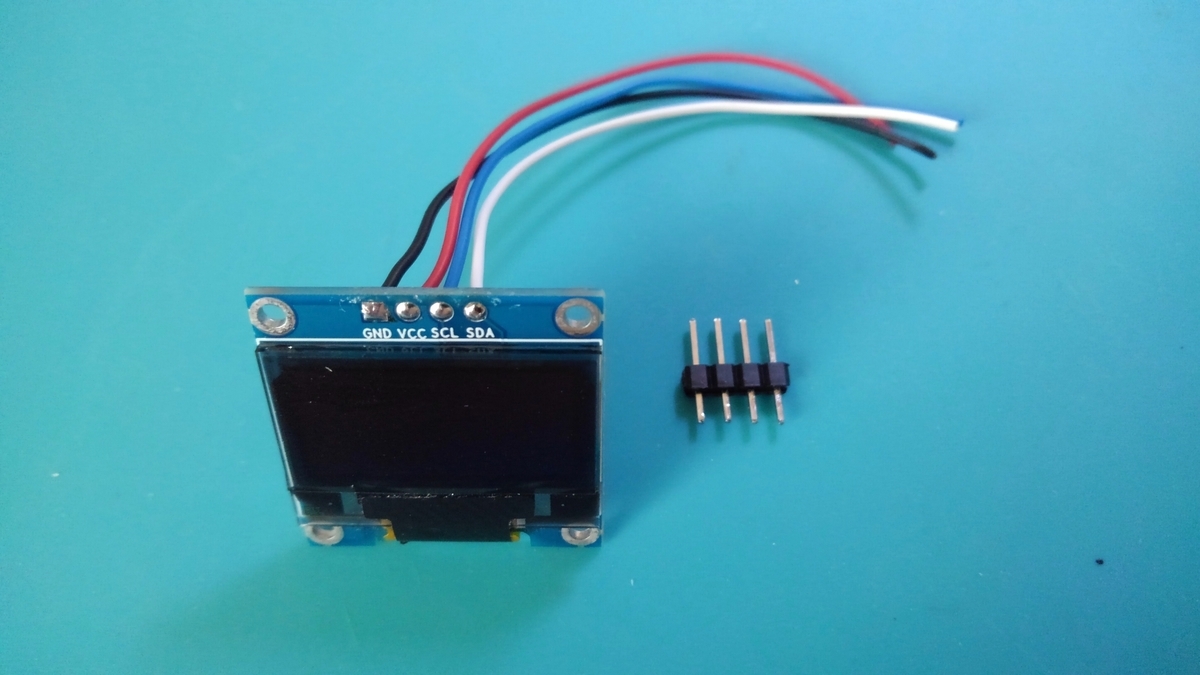
OLEDは付いていたピンソケットを外して配線を引き出しておき、
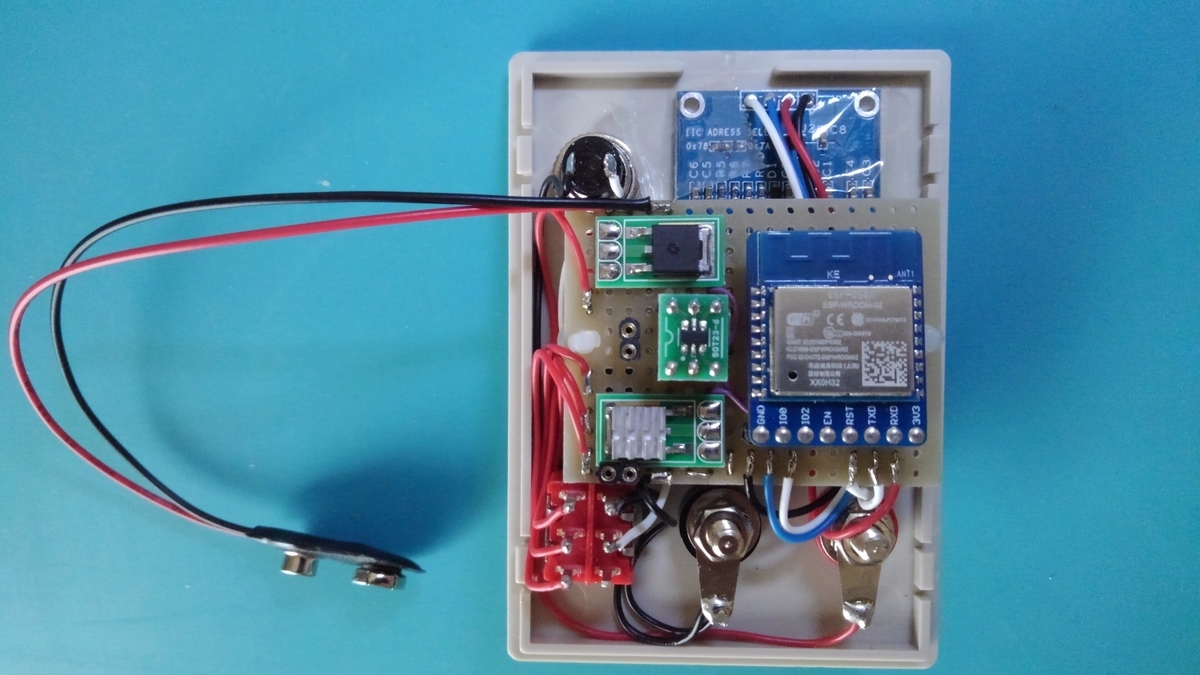
ケースに実装して必要ヶ所をつなげば
電源付き電流計の完成です。
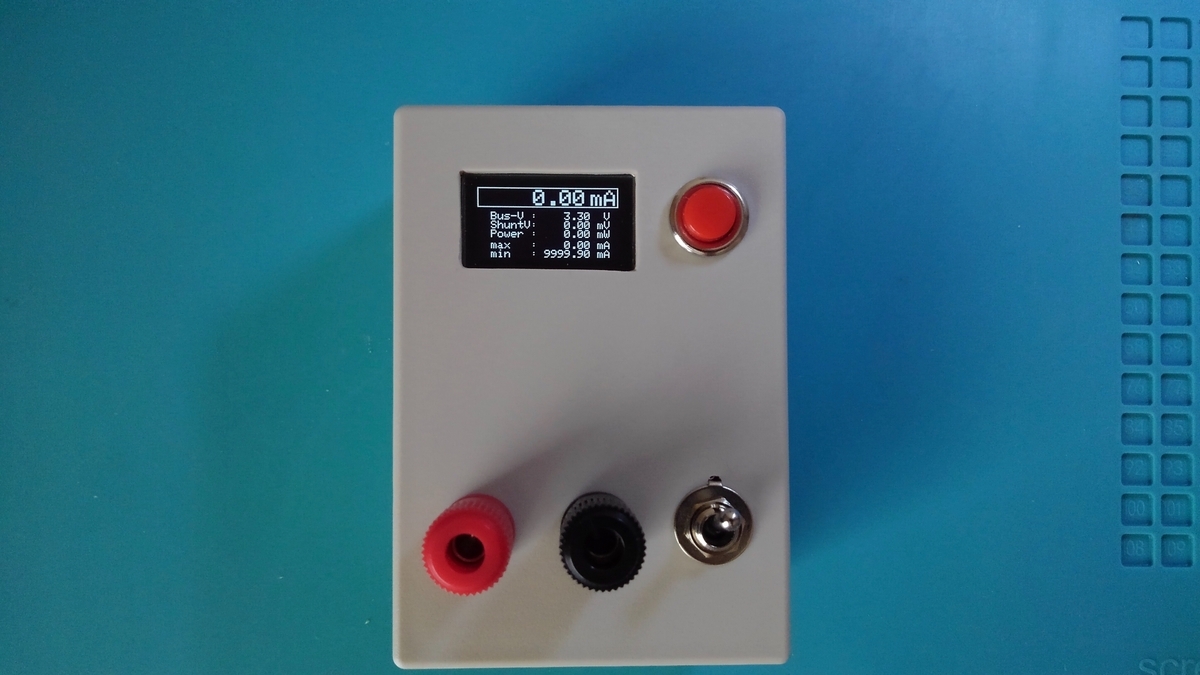
・スケッチの作成
仕様に従い(2)のスケッチに
・WiFiクライアント動作
・電流表示モードと電流記録(ロギング)モードを作成
・ロギング時間設定/モード開始用にSWを追加
を追加しました。
/**
*
*    MCP3245(16Bit ADC)電流計
*               WR02_WiFicli_ADC_OLED v0.1.1 (ok)
*
*/
// Standerd Library (IDE v1.8.57.0)
#include              <Arduino.h>
#include              <Wire.h>

// Board Library (ESP8266 v2.7.2)
/* ESP8266 Boards(v2.7.2)/Generic ESP8266 Module */
#include              <ESP8266WiFi.h>
#include              <WiFiClient.h>        // wifi_set_sleep_type()

// Install Library
/* OLED */
#include              <Adafruit_SSD1306.h>  // v2.5.7

// Global Value
/* WiFi */
#define CONN_SSID     "YOUR SSID"
#define CONN_PASS     "YOUR PASSWORD"
boolean wifi_mode =   false;

/* My ID,IP,MAC */
IPAddress ip          (YOUR IP);
IPAddress gateway     (YOUR GATEWAY);  // ex. 192,168,0,1
IPAddress dnServer    (YOUR DNS);
IPAddress netmask     (YOUR SUBNET);   // ex. 255,255,255,0

/* UART */
#define TX            1         // D1
#define RX            3         // D3

/* I2C */
#define I2C_SDA       2         // D2
#define I2C_SCK       0         // D0
#define I2C_CLK       100000    // fSCL=100KHz

/* SW */
#define SW            TX
#define SW_on         LOW
#define SW_off        HIGH

/* OLED(SSD1306) */
#define OLED_ADR      0x3C      // I2C Address
#define SCREEN_WIDTH  128       // OLED display width, in pixels
#define SCREEN_HEIGHT 64        // OLED display height, in pixels
#define OLED_RESET    -1        // Reset pin # (or -1 if sharing Arduino reset pin)
Adafruit_SSD1306      display(SCREEN_WIDTH, SCREEN_HEIGHT, &Wire, OLED_RESET);
unsigned long
        dsptime   =   0;

/* ADC(MCP3245) */
#define ADC_ADR       0x68      // I2C Address
#define ADC_REF       2.048     // [V]:Voltage Reference
float   curr_max  =   0;
float   curr_min  =   0;
boolean curr_peek =   false;

/* logging
*   log_max 5000:341sec 3000:212sec 1000: 70sec
*            450: 30sec  300: 20sec  150: 10sec */
boolean log_mode  =   0;        // 0:表示中 1:ロギング中
uint8_t log_time  =   0;        // 記録時間 10s,30s,1,2,3,4,5,6m
int     log_max[] =   {150,450,900,1800,2700,3600,4500,5400};
int     cunt      =   0;
/* Tag name:log_struct, member:mill,curr */
struct  log_struct {
  long    mill;
  float   curr;    };
struct  log_struct    logg[5400]; // 5400:RAM 70964(86%)

///// ハードウエア 初期設定
void setup() {
  /* Sleep Mode */
  wifi_set_sleep_type(MODEM_SLEEP_T);
  Serial.end();

  /* Pin Mode */
  pinMode(TX, INPUT_PULLUP);
  pinMode(RX, INPUT_PULLUP);

  /* I2C */
  Wire.begin   (I2C_SDA, I2C_SCK);
  Wire.setClock(I2C_CLK);

  /* OLED(SSD1306) */
  display.begin(SSD1306_SWITCHCAPVCC, OLED_ADR);
  /* OLED 起動表示(splash.h) */
  display.display();

  /* WiFi */
  WiFi.config(ip, gateway, netmask, gateway);
  unsigned long timeout = millis();
  while(millis() - timeout < 5000) {
    if(wifi_connect()) {wifi_mode = true; break;}
  }
}

///// メインルーチン
void loop() {
  /// 変数 初期設定
  /* レンジ切替変数 */
  float   SHUNT, GAIN, MAX;
  uint8_t DIGIT;
  byte    CMD;
  /* 測定用変数 */
  float   curr, shnt;
  byte    conf;

  /// 測定レンジ設定 (SWのチャタリング未チェック)
  if (digitalRead(RX)) {
    // HIGH Range(max:1.024A)
    GAIN  = 2;          // [倍]:PGA Gain
    SHUNT = 0.1;        // [Ω]:Shunt Resistor
    DIGIT = 2;          // [桁]:表示する小数の桁数
    CMD   = 0b10001001; // ADC 設定コマンド
    MAX   = 2047;       // 最大値
  }
  else {
    // LOW Range(max:256mA)
    GAIN  = 8;
    SHUNT = 1;
    DIGIT = 3;
    CMD   = 0b10001011;
    MAX   = 511;
  }

  /// ADC 設定 コマンド送信 (Configuration Register)
  /*   Bit  7: _RDY
  /*   Bit6,5: channel
  /*   Bit  4:  1=連続    0=ワンショット測定
  /*   Bit3,2: 00=12Bit 01=14Bit 10=16Bit 11=18Bit
  /*   Bit1,0: 00=x1    01=x2    10=x4    11=x8 */
  Wire.beginTransmission(ADC_ADR);
  Wire.write(CMD);
  Wire.endTransmission();

  /// 測定完了待ち
  /*   18Bit: 3.75SPS=270ms
  /*   16Bit:   15SPS= 67ms
  /*   14Bit:   60SPS= 17ms
  /*   12Bit:  240SPS=  5ms */
  delay(67);

  /// ADC data,config 受信(1sec以内)
  conf = 0x80;
  unsigned long timeout = millis();

  while(millis() - timeout < 1000) {
    // データ(3Byte)要求
    Wire.requestFrom(ADC_ADR, 3);
    // 3Byte未確定は 10mS待機を j回だけ実施
    for (uint8_t j=0; j<3; j++) {
      if(Wire.available() >= 3) {
        // ADC i2cデータ -> 数値変換
        shnt =(Wire.read()<< 8)+ Wire.read();
        conf = Wire.read();
        break;
      }
      delay(10);
    }
    // 受信データ確定(conf Bit7=0)で測定終了
    if (conf<0x80) break;
    delay(10);
  }

  /// 電圧->電流値変換 基準電圧:ADC_REF
  /*   ADC:12Bit 1mV       240SPS (-2048~2047)
  /*       14Bit 250uV      60SPS (-8192~8191)
  /*       16Bit 62.5uV     15SPS (-32768~32767)
  /*       18Bit 15.625uV 3.75SPS (-131072~131071) */
  shnt = shnt/32767;      // 測定精度 16Bit
  shnt*= ADC_REF/GAIN;    // 測定倍率 PGA Gain x2,x8
  shnt*= 1000;            // 表示単位 mA
  if (shnt>MAX) shnt=0;   // MAXを超えた値はエラー
  curr = shnt*(1/SHUNT);  // シャント抵抗倍率

  /// max,min計算
  if (curr_max < curr) {
    // ピーク値更新
    curr_max = curr;
    curr_min = curr;
  }
  else {
    // 最小値更新 チェック
    if (curr_min>curr && curr!=0) curr_min = curr;
  }

  /// Display/logging 判定
  if (!log_mode) {
    // データ表示 modeの場合 key check
    switch(sw_in()) {
      case 0: break;            // key入力なし
      case 1: {                 // 短押し
        // 記録時間変更
        uint8_t ele = sizeof(log_max)/sizeof(int); // 要素数
        log_time = (log_time<=ele-1)? log_time+1 : 0;
        // curr_min,max 初期化
        curr_max = 0; curr_min = 0; curr_peek = false;
        break;
      }
      case 2: log_mode = true;  // 長押し
    }
    // データ表示 (500ms毎)
    if ((millis()-dsptime)>=500) {
      dsp_curr_data(curr,shnt,DIGIT);
      dsptime = millis();
    }
  }
  else {
    // データ収集(logging) mode
    if (cunt==0) {
      // logging表示
      display.fillRect(  0,  1,128, 16,BLACK);
      display.setTextSize(1);
      display.setCursor( 32, 5);
      display.print("Logging...");
      display.display();
    }
    // データ格納
    if (cunt<log_max[log_time]) {
      logg[cunt].mill = millis();
      logg[cunt].curr = curr;
      cunt          += 1;
    }
    // データ送信
    else {
      if (wifi_mode) {
        // 送信モード 表示
        display.fillRect (  0, 1, 82, 16,BLACK);
        display.setCursor( 32, 5);
        display.print("Sending");
        cunt = 0;

        // データ送信
        for (int i=0; i<log_max[log_time]; i++) {
          // 送信状況表示
          display.fillRect ( 82, 1,128, 16,BLACK);
          display.setCursor( 82, 5);
          display.print(i);
          display.display();

          // DATA送信
          /*
          *    ここに
          *      logg[i].mill
          *      logg[i].curr
          *    をWiFi転送するスケッチを書込む
          */
        }
      }
      log_mode = false;
    }
  }
}

///// OLED Control /////
/* 電流計表示 */
void dsp_curr_data(float cur, float shn, uint8_t dig) {
  char    buf1[9], buf2[21];

  if(true) {
    display.clearDisplay();
    display.setTextColor(WHITE);

    /* Current */
    display.drawRect   (0, 0, 127, 18, WHITE);
    display.setTextSize(2);
    display.setCursor  (  14, 2);
    dtostrf            (cur, 7, dig, buf1);
    sprintf            (buf2, "%s", buf1);
    display.print      (buf2);
    display.setCursor  (102, 2);
    display.println    ("mA");

    /* log_modeing mode */
    display.setTextSize(1);
    display.setCursor  (  2, 6);
    display.print      (log_time+1);

    /* Bus-V */
    display.setCursor  ( 12, 22);
    display.println    ("Bus-V :    3.30  V");
    /* Shunt-V */
    display.setCursor  ( 12, 30);
    dtostrf            (shn,8,2,buf1);
    sprintf            (buf2, "ShuntV:%s mV", buf1);
    display.println    (buf2);
    /* Power */
    display.setCursor  ( 12, 38);
    dtostrf            ((cur*3.3),8,2,buf1);
    sprintf            (buf2, "Power :%s mW", buf1);
    display.println    (buf2);

    /* max current */
    display.setCursor  ( 12, 48);
    dtostrf            (curr_max,8,2,buf1);
    sprintf            (buf2, "max   :%s mA", buf1);
    display.println    (buf2);
    /* min current */
    display.setCursor  ( 12, 56);
    dtostrf            (curr_min,8,2,buf1);
    sprintf            (buf2, "min   :%s mA", buf1);
    display.println    (buf2);

    display.display();
  }
}

///// WiFi Control /////
/* WiFi接続開始処理 -> True:WiFi接続完了, False:WiFi接続失敗 */
boolean wifi_connect() {
  // WiFi 接続サイクルスタート(接続->確認->再接続) 3トライ
  for(int i = 0; (i < 2); i++) {
    // WiFi接続 接続が記憶されていない場合接続情報を記憶させ次回自動接続にする。
    if (WiFi.SSID() != CONN_SSID) {
      WiFi.persistent(true);
      WiFi.mode(WIFI_STA);
      WiFi.setAutoConnect(true);
      WiFi.begin(CONN_SSID, CONN_PASS);
    }

    // 5秒間 0.5秒毎に接続確認
    unsigned long timeout = millis();
    while(millis() - timeout < 10000) {
      // 接続できた場合 Trueリターン
      if(WiFi.status() == WL_CONNECTED) return true;
      // 未接続は 500ms待ちしてループ
      delay(500);
    }
  }
  // WiFi 接続不可 エラーリターン
  return false;
}

/* WiFi サーバ接続・DATA送信・切断処理 */
boolean data_send(String sendData, String ip, int port) {
  WiFiClient client;

  // DATA 送信先サーバー接続 (3秒間 接続確認)
  unsigned long timeout = millis();
  while (millis() - timeout < 3000) {
    if (client.connect(ip, port)) {
      delay(1);
      // 接続したら DATAはすぐに送信
      //client.println(sendData);  // (CR+LF)が2パケット目で送信される
      client.print(sendData+"\n"); // 1パケット送信で済む

      // 送信完了後切断
      client.stop();
      delay(1);

      // Trueリターン
      delay(100);
      return true;
    }
    // 接続できなかった場合,0.3-0.5秒おきに再接続
    else delay(250+random(50,250));
  }
  // 接続できなかったので エラーリターン
  delay(100);
  return false;
}

///// SW Control /////
/* SW Scan (チャタリング中はリターンしない) */
boolean sw_scan() {
  while (true) {
    int8_t c = digitalRead(SW);
    delay(50);
    if (c==digitalRead(SW)) {
      return (c==SW_on)? true:false;
    }
  }
}

/* SW入力 未入力:0 短押し:1 長押し(2sec):2 */
uint8_t sw_in() {
  if(!sw_scan()) return 0;
  for(uint8_t i=0; i<40; i++) {
    if(!sw_scan()) return 1;
  }
  return 2;
}
(2022.10.06 v0.1.1b改定 1.最小電流値はピーク値記録後の値に変更 2.ロギング時間変更でmin,maxクリア)
起動時の OLEDには初期設定値の Adafruitロゴを表示させていますが、Adafruit_SSD1306ライブラリ内のsplash.hのデータを変えると任意のオープニング表示が可能です。
またサンプリングレートを向上させるため
・ロギングモード中は電流値の表示をせず値の収集に専念
・収集データは structを利用してメモリ上に記録し、収集時間終了後一気にWiFiで送信
という処理を行なっています。その結果サンプリングレートは 14.7SPSと ADCの 15SPSに近い値になっており測定中に電流値を見られないという不便もガマンの範囲内かなというところです。
測定時間は log_max[ ] 内に定義すればロギング時間切替SWで順次切替ができ、SWの長押しでロギングがスタートします。今回のスケッチでは10s,30s,1〜6minの8つの時間を登録しており、測点数は5400個(6min)分を確保しています。5400測点でメモリ使用率が86%まで増加しコンパイル時に「スケッチが使用できるメモリが少なくなっています。動作が不安定になる可能性があります。」と警告が出てきますのでこの辺で止めています。
・動作試験
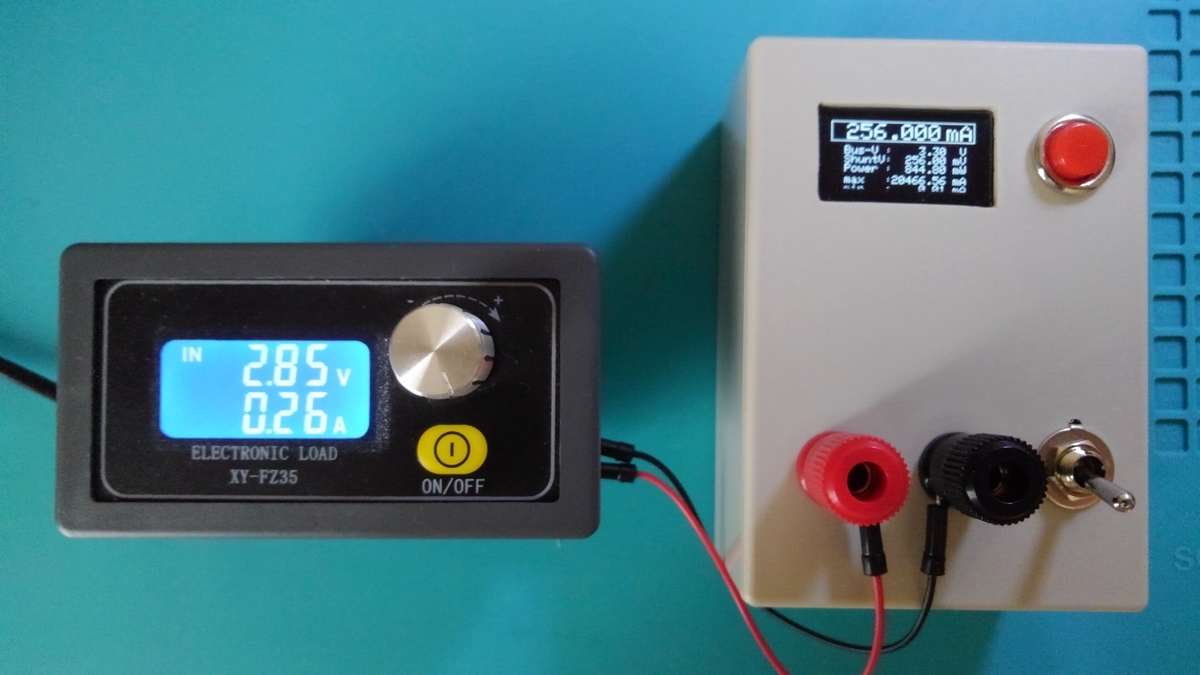
さっそく電子負荷をつないでいろいろな条件を与えてみます。
LOWモードでは 256mAでメーター振り切れ。
HIGHモードでは 500mAを流してみました。
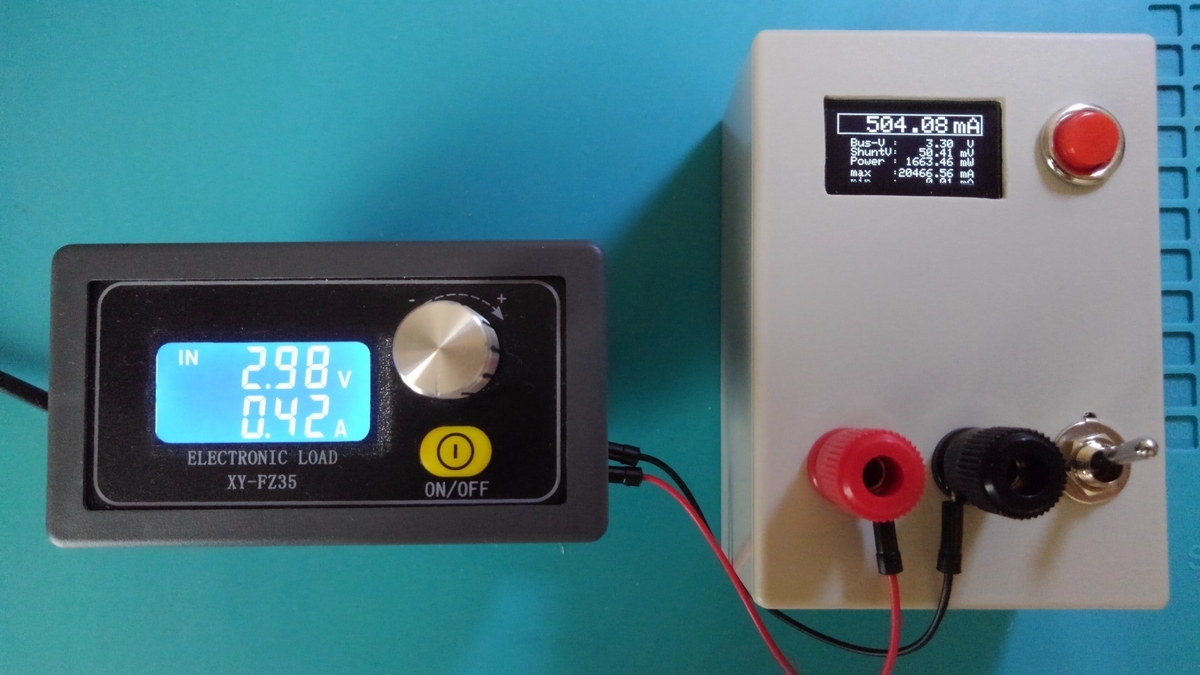
電子負荷のLED表示にはかなり誤差があり写真ではだいぶズレた数値が表示されていますが、電流が多めの範囲ではやはりシャント抵抗による電圧降下は大きめです。
そしてこの電流計のアピールポイントである電流のロガー機能。収集データは我が家の「えだまめ」ネットワーク(ラズパイ)内SQLサーバーに転送しており、そのデータをグラフにしてみました。
まずは10secのロギング。
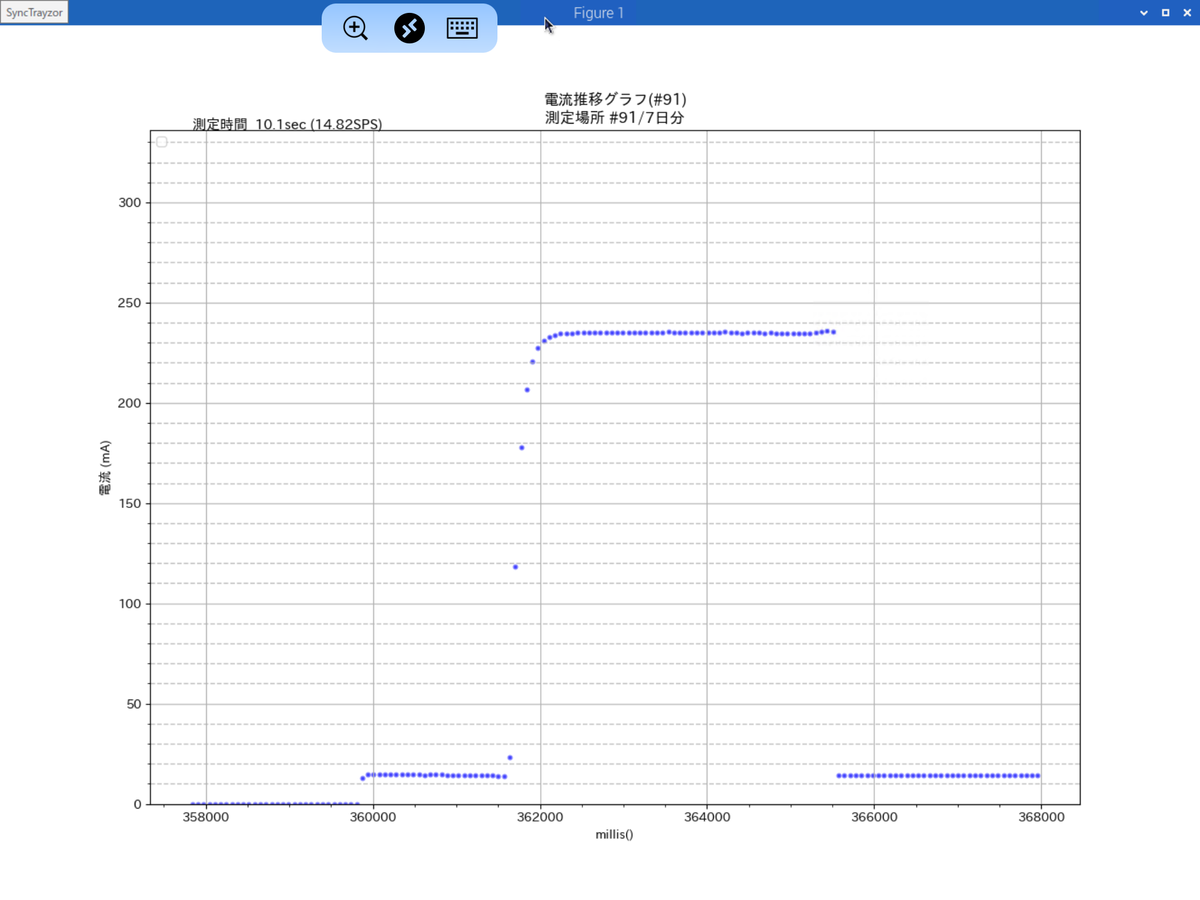
測点が少ないのでドット間のスキマガ大きく電流の変化がわかりやすいですね。グラフ左上に表示されているようにサンプリングレートは 14.69SPS。逆算して1回あたり68msの測定時間。ADCの変換時間以外は1msしか使っていない勘定です。
グラフで電子負荷の出力が100%になるまでの測点を数えると10個。1点68msとすると負荷の立ち上がりに700ms近くかかっているのがわかります。
続いて 30sec、60secのロギング結果。


電子負荷の立ち上がり・立ち下がり時間がかろうじてわかるかな〜という感じです。
そしてロギング時間最大の 6分。
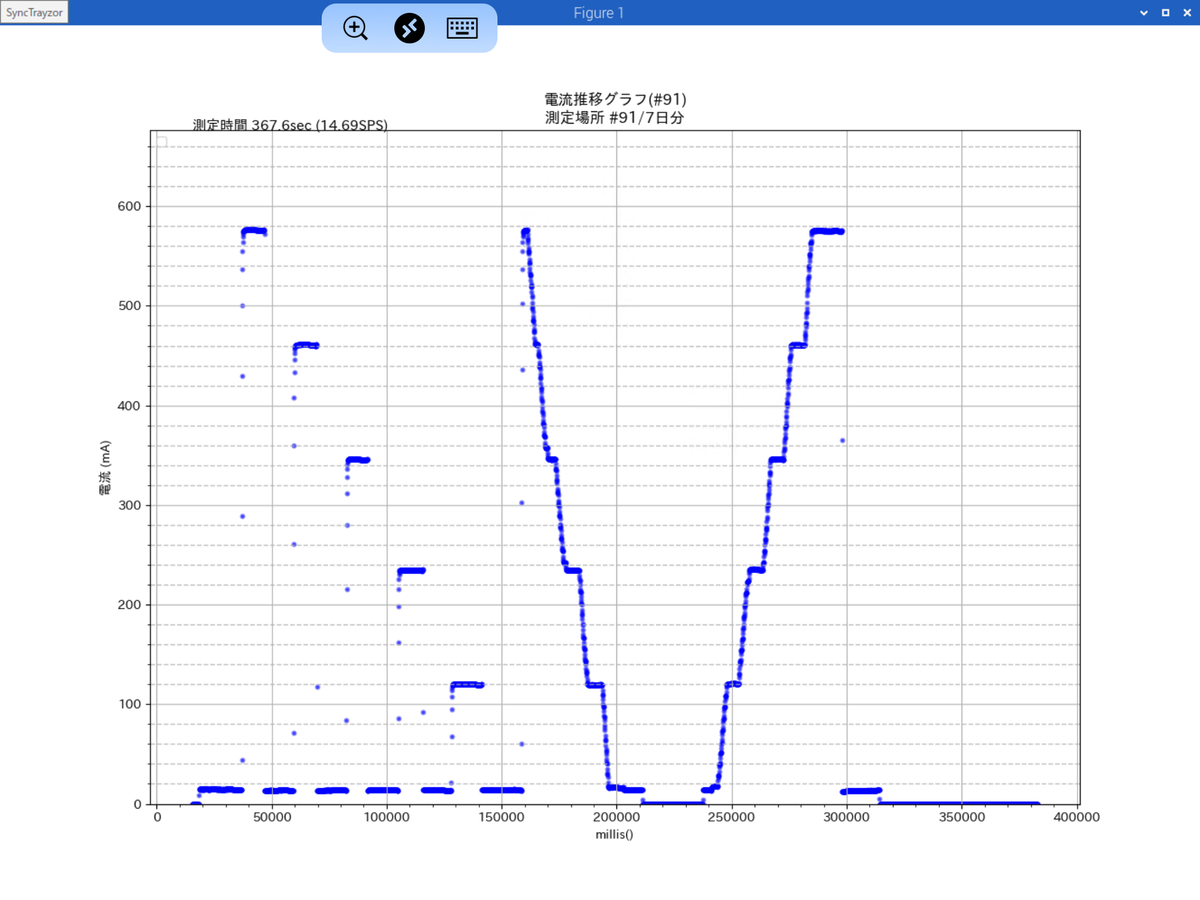
負荷状態をいろいろ変えてみましたがキチンと追従しているようです。
どうやら3.3V電源供給型電流計、簡単に言うと3.3V電源(電流計付き)が無事完成したようです。
◯やってみて
これでブレッドボードの実験時に簡単に電源を供給することができるので「超便利!」と気分が高揚していたのですが、実は現状で大きなミスをしている事を発見。それは何かというと…
「電源スイッチのつけ忘れ」
なんと、しょうもない。
この際だから OLEDの電源を FETで電源制御して deelSleep()を利用したオートパワーオフ機能を追加しようかと考えてました。起動はリセットスイッチです。電流計 ver1.1の仕様がさっそく決定です。